Archives
now browsing by author

EK-Loop Vertical GPU Holder
|
|
|
|
|
|
|
|
|
|
|
|
|

EK Introduces L-Shaped Brackets
|
|
|
|
|
|
|
|
|

EK Velocity Copper + Plexi CPU Water Block
Unboxing, and Overview Video Review
EK Velocity is the new high-performance flagship premium quality CPU water block for modern Intel processors. It features a fresh design that will enable a vast number of variations and options for enthusiasts and demanding users as well!
EK Velocity series CPU water blocks embed the 5th generation of the award-winning EK® CPU water block cooling engine, further tweaked for performance and optimal coolant flow! Low hydraulic flow restriction enables this product to be used in setups using weaker water pumps or lower pump speeds for added silent operation, while still achieving top performance!
The purest copper available on the market is used for the EK-Velocity cold plate which is precisely machined to a dense micro-fin structure. The contact surface itself is machine polished for a better contact with the CPU IHS. This version of the water block features a nickel-plated copper cold plate with a CNC machined high-quality glass like Acrylic top piece.
The new cooling engine is characterized by the top-integrated jet nozzle which is combined with a thicker jet plate allowing a more precise bow control. The simplified water block structure offers a more optimized coolant flow and easier maintenance, while the interchangeable thick jet plate ensures the best contact surface for mainstream and HEDT Intel platforms.
The block is equipped with a reinforced hold-down bracket, and the enclosed mounting kit includes all the necessary mounting screws, mounting springs, an Intel 115x backplate, rubber backplate gasket and a small tube of Thermal Grizzly Hydronaut high-performance thermal paste. The EK Velocity CPU water block features a universal mounting mechanism that offers error-preventing, tool-less installation supporting Intel LGA-115x and LGA-20xx sockets out of the box. The mounting screws are streamlined and are even smaller than before for an added aesthetical perfection.
CPU socket compatibility:
– Intel LGA-1150/1151/1155/1156
– Intel LGA-2011(-3)
– Intel LGA-2066
Made in Slovenia – Europe!

EK Vector RTX 2080 Ti – Copper + Plexi GPU Water Block
Unboxing, and Overview Video Review
Details
The EK Vector high-performance water block is specially designed for multiple NVIDIA® GeForce® RTX Turing based graphics cards. The water block itself uses the signature EK® single slot slim look, and it covers the entire PCB length. This sophisticated cooling solution will transform your beefy graphics card into a minimalistic, elegant piece of hardware. The block also features a unique aesthetic cover over the block Terminal which is designed to reveal the graphics card model, visible from the side.
This water block is compatible with all reference design GeForce RTX 20×0 based graphics cards, but as always, we recommend that you refer to the EK® Cooling Configurator for a precise compatibility match.
The water block directly cools the GPU, VRAM and the VRM (voltage regulation module) as cooling liquid is channeled directly over these critical areas. These newly developed water blocks feature a redesigned cooling engine that has a larger footprint compared to the previous generation of EK® Full Cover water blocks. This results in a larger surface area for heat transfer which increases the thermal performance of these water blocks.
The EK Vector Series water blocks use an Open Split-Flow cooling engine design which proved to be a superior solution for GPU water blocks. It is characterized by low hydraulic flow restriction, which means that it can be used with weaker water pumps, or pumps running on low-speed settings and still achieve top performance. The jet plate and fin structure geometry have been optimized to provide even flow distribution with minimal losses and optimal performances even when used in reversed water flow scenarios.
The base of the block is CNC machined out of electrolytic copper while the top is CNC machined out of high-quality acrylic material. Sealing is ensured by high-quality EPDM O-Rings. The brass standoffs are already pre-installed and allow for a safe and easy installation procedure.
EK® recommends the purchase of a retention backplate which improves the aesthetics of your graphics cards, but also provides additional passive cooling to the GPU core and circuit board VRM section.
G1/4″ threaded fittings can be used on both sides of the terminal and for multiple GPU connectivity, please refer to our offer of GPU Terminals. The EK-Vector GPU water block terminal cover is not compatible with FC Terminal X and FC Terminal (Legacy) multi GPU connectivity bridges.
The NVIDIA® NVLink is compatible with this water block.
Enclosed:
– EK Vector series high-performance water block
– Mounting mechanism with screw-in brass standoffs
– Necessary mounting screws, nuts, and washers
– 2x Nickel plated brass plug G1/4”
– 6mm Allen key
– Thermal pads
– Thermal grease EK-TIM Ectotherm (1g)
Made in Slovenia – Europe!

Crate Computer Case Unboxing and Overview
Crate Computer Case
Unboxing, and Overview Video Review
The Crate Computer case is an MITX form factor PC chassis. It includes a monitor mount, and is a great solution for a portable or LAN rig. The Crate Computer case was designed for everything ITX, SFF PSU, 2.5″ HDD/SSD only, 92MM fan capability, and of course an ITX Motherboard.
CPU socket compatibility:
– MITX Motherboard
– Vesa Monitor Mounting Capability
– SFF PSU
– 2.5″ HDD/SSD only (QTY 2)
– 92MM Fan Capability
Thermaltake X1 Keyboard Review Premium Cherry MX Silver Keys
The Thermaltake X1 Keyboard comes in a sleek and stunning finish that delivers 16.8 million of true RGB color illumination with 12 dynamic lighting effects. Best yet, it is exclusively compatible with all Thermaltake TT RGB Sync Power Supply and Liquid Cooling Solutions – iRGB PSU, Riing Plus, Pacific W4 Plus CPU Water Block, Pacific RL360 Plus RGB Radiator, Floe Riing RGB 360, Pacific Lumi Plus LED Strip – and any other product range sporting the TT RGB Sync logo, enabling enthusiasts to sync all RGB colors seamlessly to all Thermaltake compatible product lines for even greater color coordination. In addition, the Thermaltake X1 Keyboard comes with an exclusively designed smartphone/tablet app with voice controlled AI for access to light functions and essential macros. The app also includes an exclusive patented designed Virtual Game Controller (VGC) mode for a truly unique and astounding mobile gaming experience.
Thermaltake X1 Keyboard CHERRY MX SILVER SPEED SWITCH
The Thermaltake X1 Keyboard is Designed for speed, the Cherry MX Silver speed switch provides smooth linear actuation with both lower actuation point (1.2mm) and total distance travelled (3.4mm) resulting in lighting fast response with each key press. The switches also come rated with a 50-million keystroke lifespan for utmost durability.
16.8M TRUE RGB ILLUMINATION WITH 12 LIGHTING EFFECTS
Stunning 16.8 million RGB color illumination under keys provides the brightest visibility and eye-catching style for your gaming session. Take it a step further and choose between 12 different lighting effect settings coupled with 5 individual levels of brightness and lighting speed to provide maximum color customization tailored your style.
TT X1 RGB SYNC COMPATIBLE
Take control of your Thermaltake X1 Keyboard colors and sync seamlessly with all Thermaltake TT X1 RGB Sync compatible Power Supply and Liquid Cooling Solutions – iRGB PSU, Riing Plus, Pacific W4 Plus CPU Water Block, Pacific RL360 Plus RGB Radiator, Floe Riing RGB 360, Pacific Lumi Plus LED Strip – for maximum color coordination and personalization. (TT X1 RGB Sync compatible product lines will automatically sync with the X1 RGB gaming software and does not require manual setup)
AUDIO AND USB PASS THROUGH
Connect your compatible 3.5mm 4-pole audio and USB 2.0 device via the conveniently placed pass-through for easy insertion and removal, without having to reach behind your computer.
MAGNETIC WRIST REST INCLUDED
Included ergonomic magnetic wrist rest easily snaps into place at the front of the keyboard to ensure comfort is maximized, no matter how long you game.
CUSTOMIZE WITH TT PREMIUM X1 RGB GAMING SOFTWARE
Customize with the TT PREMIUM X1 RGB gaming software and take control of the most expansive set of macros and personalization options. Give yourself full control to program multiple keystrokes to a single key, change backlighting effects with intuitive keyboard commands or set with easy to quick launch custom game profiles.

Swiftech Drive X3 AIO CPU Cooler Review
Unboxing, Installation, Overview, and Performance Video Review
Test System Specifications
Custom Loop Specifications
Swiftech Drive X3 AIO Specifications
Our Gaming chart was derived from a 4 hour gaming session of PUBG with settings set to high, in which we repeated twice, and took the average temperatures from the two sessions. We performed this test both on our Custom Loop Cooling as denoted above, and the Swiftech Drive X3 AIO. All fans were set to max speed for both test setups and tests.
Firestrike was run three times consecutively and the average of the three runs were reported. We performed this test both on our Custom Loop Cooling as denoted above, and the Swiftech Drive X3 AIO. All fans were set to max speed for both test setups and tests.
Being that the Swiftech Drive X3 AIO that we tested was a 240mm version, which uses 2x120mm fans, it kept up fairly well with our full custom loop using a 360mm radiator and 3x120mm fans.
Swiftech Drive X3 AIO
Swiftech is proud to announce our latest advances in All-in-one Liquid Cooling CPU cooler: Swiftech Drive X3 AIO CPU cooler. The new X3 AIO series has received a great number of improvements which are all detailed below.
Also, please note that all Swiftech products including a Liquid Cooling radiator released since Q3-2018 (July 2018) are now following a new sizing and naming convention. The number in the product name now is the result of the multiplication of the number of fans (per side) and the size of the fan. For example, our dual 120 mm AIO that used to be named “H220” are now named “H240”.
What’s New?!
At the time of the release, two radiator sizes are available for dual 120mm fans and triple 120mm fans.
Swiftech is also releasing a new 120 mm fan design, that features:
Improved static pressure and maximum discharge
Lower operation noise level
Swiftech IRIS compatible addressable RGB’s built-into the frame of the fans
The Swiftech Drive X3 AIO CPU Cooler features aa fully redesigned patented radiator/reservoir/pump combo featuring a tempered DIY grade glass reservoir, and a leak-proof acrylic-free manifold design.
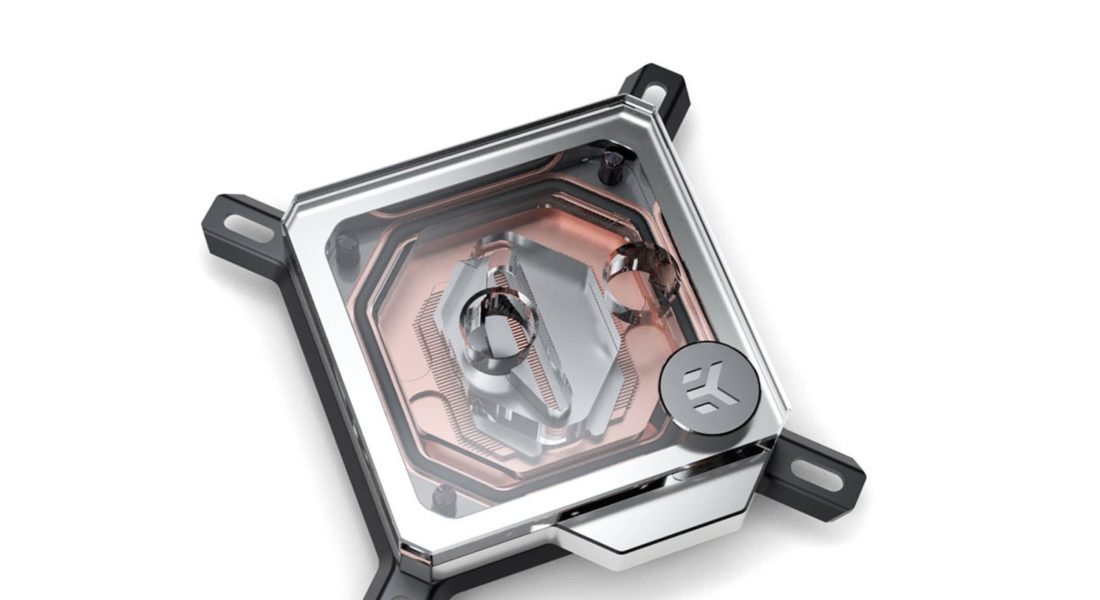
The new CPU waterblock, the Apogee™ SKF “LT”, which is based on the award winning Apogee SKF, Swiftech’s new flagship waterblock released in 2017. The apogee SKF “LT” features the exact same Skived Fins thermal engine. The waterblock housing features an acrylic-free design and 6x Swiftech IRIS addressable LED’s for endless customization. The retention hardware has been enhanced for an even easier and trouble-free installation, and it is compatible with all current desktop processors from Intel® and AMD.
Cooling Engine: 0.125 mm x 0.125 mm micro-fin array
A clear departure from all other AIO’s: the use of maintenance free Mayhem ultra-clear tubing, providing the overall custom looks and feel of the product: now, you can clearly see that your system is liquid cooled!
A new PWM and RGB controller: Swiftech IRIS ECO V2, which now features three customizable lighting effects allowing users to select effects and customize color and brightness.
Along with the inclusion of red, blue and green Mayhem color dyes, Swiftech is also proud to announce that all X3 AIO CPU coolers ship with the best coolant on the market: the Mayhem Pastel White Nanofluid Coolant.
Features & Benefits
“From virtually silent to comfortable audible noise levels” | Our design objective for all Swiftech products is always to minimize the operating noise while preserving high thermal performance characteristics. At its lowest speed settings, our Drive X3 AIO cooling systems are virtually inaudible. At its maximum speed, it remains within comfortable audible noise levels. |
“Plug-and-Play” | With pre-installed fans, and the new Apogee™ SKF “LT” mounting system, the Drive X3 AIO’s are probably the easiest AIO liquid cooling CPU Coolers to install bar none, and are even easier to setup than many high-end air coolers. |
“Superior Thermal Performance” | Thanks to Apogee SKF Thermal Engine and the copper radiator, high static pressure Helix™ IRIS 120 mm fans, more powerful DC pump than any other AIO on the market, the Drive X3 AIO coolers deliver superior thermal performance to any comparably sized system on the market. |
“Expandable/Customizable” |
The Swiftech Drive X series, including the new X3 series
|
“Automatic speed and lighting control right out of the box” | Speed control of fan and pump are PWM compliant, allowing the Drive X3 series to be recognized and controlled by the motherboard depending on CPU temperature just like any standard CPU cooler. The system includes a PWM controller allowing connection of up to 4 PWM devices (2 to 3 fans depending on model + the pump) which can then be controlled as one by the motherboard. For lighting control, the IRIS ECO controller also includes 3 |
“Maintenance-free” | As shipped from our factory and installed as directed, the Drive X3 AIO CPU coolers require no maintenance for about 3 years. If upgraded by the user, the interval of time between refills will depend on how users implement their customized loop. |
“Installation in any orientation” |
The radiator can be installed * Important note: when installed |
“Best Case Compatibility” | Thanks to the location of the integrated pump & reservoir, the overall radiator length is in fact the shortest in its class of all AIO’s on the market. This will help to fit the Drive X3 AIO coolers in cases where most other AIO’s would not. |
“Reliability” | Both fans and pump are rated for a 60,000 MTBF (Meantime Between Failures) |
“Support” | With over 15 years of experience designing, manufacturing and setting up liquid cooling systems, Swiftech® customer service can assist you in setting up and troubleshooting your system 6 days a week, 12 hours a day. We are here to help! |
Content & Specifications
Specifications | |
Radiator with patent pending integrated pump and reservoir (1 each) | |
Radiator body | |
Material | Brass tubes, louvered copper fins |
Body dimensions | 127 mm x 254 mm x 28 mm (H240X3) / 127 mm x 375 mm x 28 mm (H360X3) / |
Fill-port thread class | G 1/4 |
Barb fittings | Integrated swivel 90° elbows, 3/8″ (10mm) OD |
Installation hardware |
|
Lighting type | Swiftech IRIS compatible ALED |
Reservoir | |
Material | Tempered Glass |
Capacity | 70 ml |
Lighting type | Swiftech IRIS compatible ALED |
Pump | |
Pump speed control | PWM |
Pump Speed range | 1200 ~ 3000 RPM |
Pump nominal voltage | 12 VDC |
Pump nominal power | 6W |
Max. Static Pressure | 2.8 mH₂O |
Max. discharge | 11 l/mn |
Redundant fail safe |
|
Pump Bearing type | Ceramic shaft, PTFE bearing |
Pump Power connector | SATA |
Pump RPM & PWM connector | Mini 4-pin |
Pump MTBF | 60,000 hours |
ROHS | Compliant |
Helix™ IRIS Fan | |
Dimensions | 120 mm x 120 mm x 25 mm |
Speed control | PWM |
Speed range | 900+/- 25% ~ 1800+/- 10% RPM |
Airflow range | 24 ~ 60 CFM |
Static pressure range | 0.61 ~ 2.35 mmH₂O |
Noise level range | <16 ~ <32 dB/A |
Nominal Voltage | 12 v |
Nominal current | 0.2 A |
Bearing Type | Z-axis |
Connector | Mini 4-pin |
MTBF | 60,000 hours |
ROHS | Compliant |
Apogee™ SKF “LT” Waterblock | |
Housing material | Acetal |
Base plate material | C110 copper |
Cooling engine | 0.125mm x 0.125 micro-fin array |
Barb fittings | Swivel elbows, 3/8″ (10mm) OD |
Port thread | G1/4 standard |
Installation hardware & processor + socket compatibility |
|
Lighting type | Swiftech IRIS compatible ALED |
Tubing & Coolant | |
Material | Mayhem non-plasticizing PVC tubing |
Color | Clear |
Dimensions | 5/8″ x 3/8″ (16/10mm) |
Coolant | Pre-filled with Mayhem’s non-toxic Pastel Nanofluid Coolant |
Clamps (4 each) | |
Material | Black anodized aluminum |
IRIS ECO V2 Controller (1 each) | |
PWM Ports | 4 |
RPM signal port | Channel 1 |
ALED connectors | 3 |
2 pin connector | 1 |
Power connector | SATA |
PWM/RPM connector | Mini 4-pin |
Installation hardware | Peel-off sticker, mounting screws & nuts |
ROHS | Compliant |
Tim-Mate 2, 1g syringe thermal compound | |
Quick Installation Guide |
Radiator Dimensions
Acrylic Strip Heater Tutorial
The acrylic strip heater is useful in many ways. Not just for computer modification, but really to bend or shape any types of acrylic or plastic. This is a tool that has a heating element, centered in a channel, that when the acrylic is placed over the heating element, it begins to soften and allow syou to flex the acrylic into any shape you desire. This tool will be very useful to me when creating acrylic power supply shrouds, as well as any other acrylic work that I need to accomplish during computer modding.
I have a video embedded in the page for you that not only gives you an idea of what the acrylic strip heater looks like but also how to use the acrylic strip heater. I am sure that there are many of these available to purchase, but I will provide you with a link to the one that I am using in the video. If you would like to purchase your own, you can do so from here: Delvie’s Plastics I am not affiliated in any way with Delvie’s Plastics, it is just who I use when I need to purchase things, and they are great to work with.
Please either watch the video below, or click and you will be redirected to YouTube in which you can watch the video there. I actually give you a demonstration on using the acrylic strip heater in the video on different types of acrylics. All in all this strip heater is a great price, and really works as intended. I am super happy with adding this tool to my inventory, and will use this many times in the coming years for all of my acrylic bending needs.
In this video we show you how to bend acrylic using an acrylic strip heater.

Painting Steps to Achieve That Perfect Finish
Creativity drives us to be different. Or does it? Does our mind realize that we are being creative, or is this just normality, outside the norm of what people consider normal? Is creativity just inherent in some, but abnormal for others that cannot fathom these concepts? This could explain why some see things differently than others, and why some believe they could do what the creative types accomplish if given the “tools” they have. Here are some painting steps to help you achieve the perfect finish.
See creativity by definition is “the use of the imagination or original ideas, especially in the production of an artistic work.” (google.com) When we look at the modding world today, it is a creative accumulation of works by the modders. But how do they do this work? That is what brings us here today, and I want to discuss painting steps. It is very widespread as the easiest and most common thing to do, to alter, or modify the computer case that you own. You can paint parts of the case, or the entire thing. You can paint components, just portions or the entirety. This makes it something that is done very often, even by the novice modder.
Let’s take a look at the painting steps to achieve that perfect finish. These are painting steps that I use, and some of the products I use to help achieve that perfect finish.
Step 1. Sanding – The first thing we need to do is scuff the surface that we are going to paint. Now it is not necessary to sand down to bare metal, but just to remove the shine. For this I generally use 400 grit sandpaper, and for difficult areas of the case I use my sandblaster and a media equivalent to 400 grit sandpaper. Generally you end up with a surface as seen below:
Sanded Surface
This was the first sanding stage, so do not fret if it looks uneven, basically we just need the surface scuffed to have good adherence for the paint.
Step 2. Cleaning – After you have your surface sanded, you must ensure that all the dirt is removed in order to achieve a quality paint job. I use dawn dish soap, a bucket of water, and a wash mit. The dawn soap also acts as a grease remover. So just as you would your car, I ensure to thoroughly wash the object in which we are painting, and rinse it thoroughly. I then let the piece air dry, and use my air compressor to blow off any residual water, especially from corners and over lapping areas that may hold the moisture in. (Please note, if you are painting your motherboard for example, please do not wash it, skip this step and proceed to the next.)
Step 3. Gloves – Before moving any further, grab a pair of your favorite dust free gloves, nylon, latex, nitrile etc… and put them on, from here forward we do not want to touch the surface to be painted, as the oils in your hands can affect paint adhesion.
Nitrile Gloves
Step 4. Surface Solvent Prep – After your surface is dry, and you are 100% sure there is not any water hiding in corners (paint won’t adhere to water) grab a lint free cloth, and grab some prep sol, or better known as Grease and Wax Remover.
Grease and Wax Remover
Wipe down the entire surface to be painted, and follow with a clean lint free rag to wipe off the excess.
Step 5. Mix Your Paint – Next we want to prepare our paint that is to be sprayed. Most auto grade paints can stay in their mixed state for a few hours before becoming unusable (please reference the information on your paint label). I always use a measuring cup for this, they are cheap, you can grab them at Wal-Mart for about 85 cents, and most the time I do not attempt to reuse them, I just properly dispose of them. Your paint will have the correct mixing ratio on the label, for mixing the paint with the hardener and reducer (if required).
Mixing Cup for Paint
After your paint is mixed into your measuring cup, grab your strainer and paint gun and move on to the next step.
Step 6. Tools to Paint – Grab your spray gun, your ventilator/respirator mask, pour your paint into your gun and put on your respirator.
Painting Mask
I have a cradle that my spray gun sits in, so that way I can have my paint in my gun, my gun connected to my compressor, with the appropriate air pressure set, put on my respirator, and be all ready to spray before the next step, which is the last step for the prep work.
Step 7. Tack Cloth – I already showed us the value of a tack cloth in this article entitled Tack Cloth. At this point I give the entire piece one final wipe down with the tack cloth, to help remove any final dust or dirt particles that may have settled when my back was turned, (pesky little pests).
Tack Cloth
Step 8. Lay Down Some Paint – Yes after all that prep work it is finally time to paint! Painting is 75% preparation, 25% painting. The details are what helps us to ensure a great finish on our project. The first coat of paint we lay down should be what is called the “Tack Coat”. This is a very light coat of paint, to just give a mist of paint over the surface, and is the last step to help adhesion of the paint to the surface. After the Tack Coat sets, you want to lay two “Wet Coats” of paint. After this let the paint setup according to the specifications of your paint.
Step 9. Clear Coat – After you have laid down sufficient coats of paint, and you are pleased with the outcome, we must wet sand the surface, and lay down the clear coat. Yes we start all over, but this time we don’t dry sand, we wet sand, to help ensure a smooth final surface. Lay down your clear coat as specified by your paint, and if you follow these painting steps your end results should look something like this!

Tack Cloth: A Necessary Tool for Dust Removal Before Painting
Anyone who is looking for an exceptional finish, is always concerned with cleanliness. This could be in relation to getting ready to go out on a first date, cleaning your windows, or pulling the weeds from your garden, yes even dirt can be cleaned of weeds. But why is an exceptional finish necessary? To all it isn’t, but to those of us who want the things we do, to reflect the person behind them, cleanliness is very important. So lets have a look at how the tack cloth can help our paint jobs.
Have you ever attempted to apply window tint? If not this is a lesson in futility that I believe everyone should experience at least once in their lifetime, at least anyone who is interested in modding. It doesn’t have to be on your car, just pick up some cheapo window film from your local automotive shop, and try it on a spare piece of glass, or an easy to access window in your home. What you will quickly learn, is that as much as you think you have removed all dust from the surface, once you apply the window film, you will see just the amount of dust that still remains.
How does this relate to modding? Well a large portion of modding, is painting your case to a certain color, to match the theme, or mod that you are working on. There are many important factors that come into play when it comes to modding, but a Tack Cloth, or Tack Rag, is one that I see talked about, but never really explained fully its true importance. I have noticed people say use a Tack Cloth to remove the final dust, THIS IS IMPORTANT, but never really speak of why this is so important. SO let’s start with some basics.
What is a Tack Cloth? A Tack Rag, or Tack Cloth is a specialized wiping cloth, treated with a tacky material, used to remove particles of dust, lint, or dirt. That dust, could contaminate the surface you are about to paint, and thus needs to be eliminated before applying any type of paint. Just because you are applying primer, and it won’t be the final finish, that dust, sometimes microscopic, needs to be removed.
Here we can see a Tack Cloth:
The description on the front label of the Tack Cloth reads:
I purchased this Tack Cloth from Harbor Freight, at the following link:
Tack Cloth
They can also be found on Amazon for about 3 dollars from 3M:
Tack Cloth
You can see how inexpensive this item is, but its importance to the final outcome of your paint job, is dramatic. Adding up the amount of money spent on sand paper, primer, paint, clear coat, if you do not take this step and spend the money on your Tack Cloth, the end result will show.
Hopefully this will help some of you eliminate some dust from your paint jobs, allowing you to eliminate a step in having to wet sand dust out of your final finished paint. Thanks for reading this article, and here at Precision Computing we look forward to bringing you more modding tips, to help you out with your future case mods.